How to perform live boot using a DHCP server.
We need VirtualBox and the following 4 virtual machines:
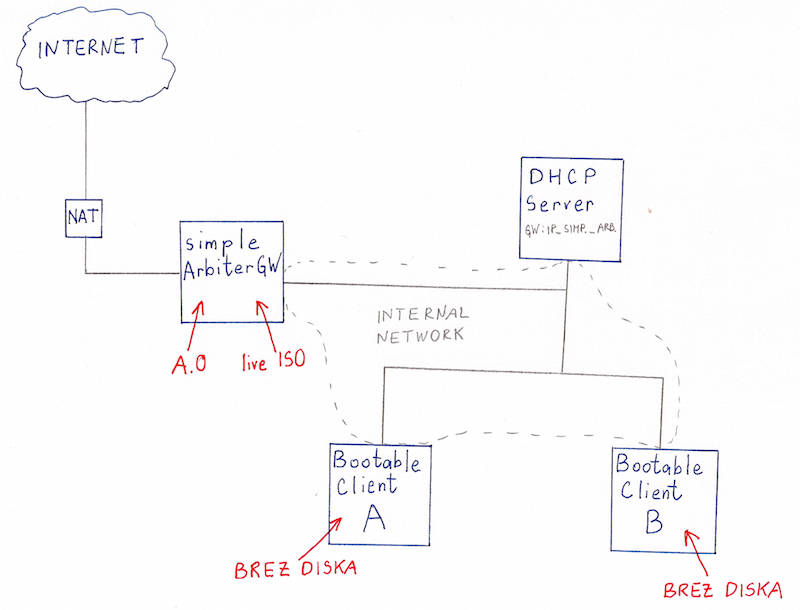
Our goal is to make BootableClient A get it's IP through DHCP server and boot up using file A, which is located on simpleArbiterGW,If we run BootableClient B machines, we would like it to retrieve it's IP through DHCP server and boot from some live ISO which is also located on SimpleArbiterGW.
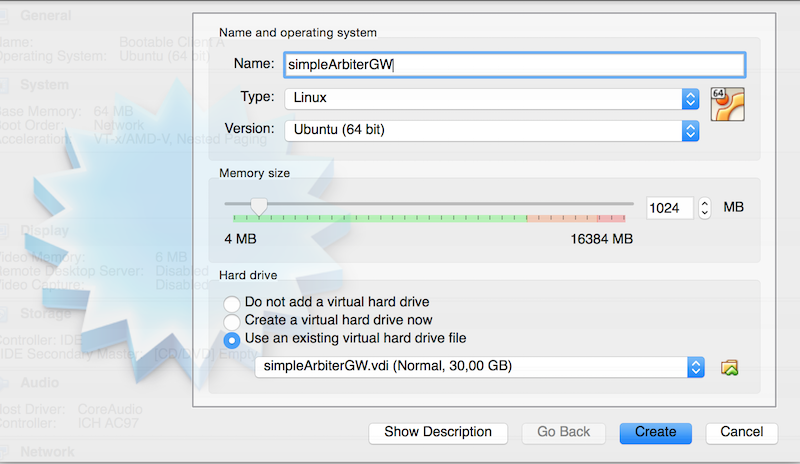
Download simpleArbiterGW.vdi and then run VirtualBox. After the file is downloaded, choose the New option in VirtualBoxu and set simpleArbiterGW in the Name field.Memory size should be set accordingly (1gb will suffice). Then choose "Use an existing virtual hard drive file" and select simpleArbiterGW.vdi clicking Create.
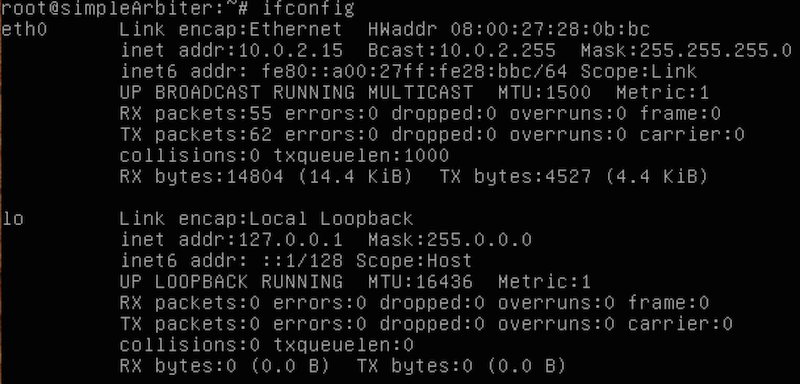
We start our virtual machines simpleArbiterGW using the following login credentials; username: "root", password: "kaboom". At the start, the computer on NAt get's it's IP(in our case 10.0.2.15).(to check this useifconfig) We now use this address and eth0 interface to access the internet.
However, we would like this machine to have 2 interfaces! One on NAT(we already have this one), and the other one on Internal Network,throuh which we will communicate wiht the DHCP Server and other machines on our Internal Network. We add a new interface, by turning off the virtual machine, select our machine in VirtualBox and select računalnik, ter v VirtualBoxu Settings -> Network Adapter 1 is already set to NAT, we set Adapter 2 to Internal Network

So, now we have two network interfaces!In VirtuaBox we can define multiple Internal Networks, however, for our need's two will suffice. We save the settings and restart simpleArbiterGW. What we must do now, is to assign both interfaces IP addresses. We do this by setting theinterfacesfile located at/etc/network.
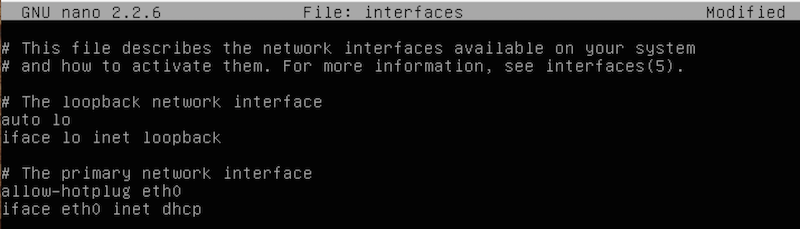
Eth0 was already handled by and integrated DHCP, so eth0 had been assigned an IP). We have to set up the other network interface. If we don't know it's name, we find it out using ifconfig -a.

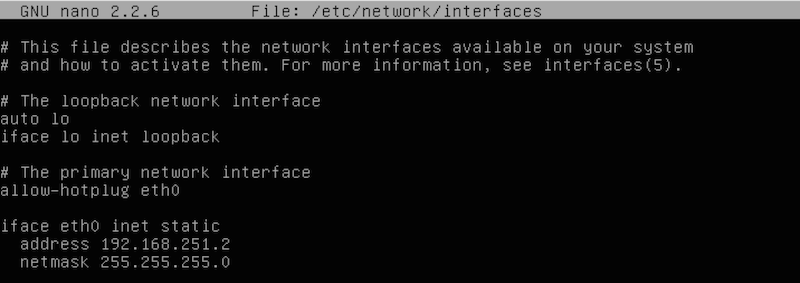
We can conclude the interface names is set to Eth1. Now we would like to assign an IP naslov to Eth1. Ifconfig could be used, but rebooting the machine would reset the settings. Which is not ideal :) So configuring /etc/network/interfaces would be a better idea. Let's make up a random local network or a local area network or local area network address and assign it to eth1.
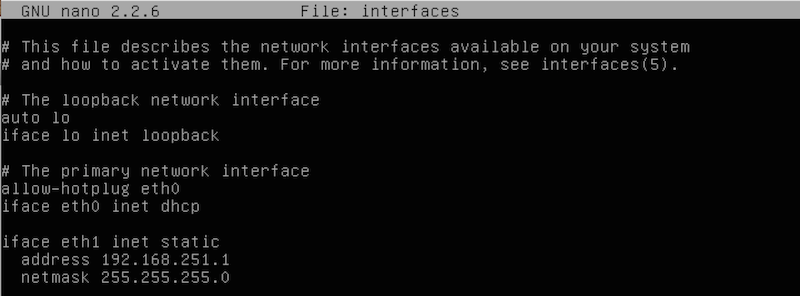
We save the config file. Our machine still has no IP on eth1 so we use the ifup eth1 command

Now we use the ifconfig command, to see whether and ip is assigned to eth1 interface
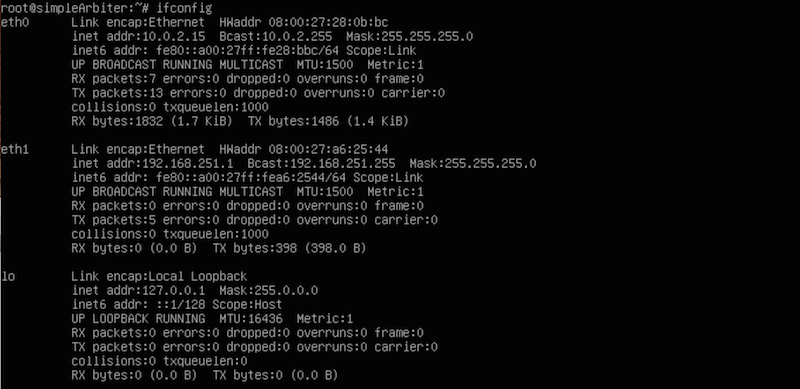
We can see the IP is set. Now let's set up the DHCP Server!
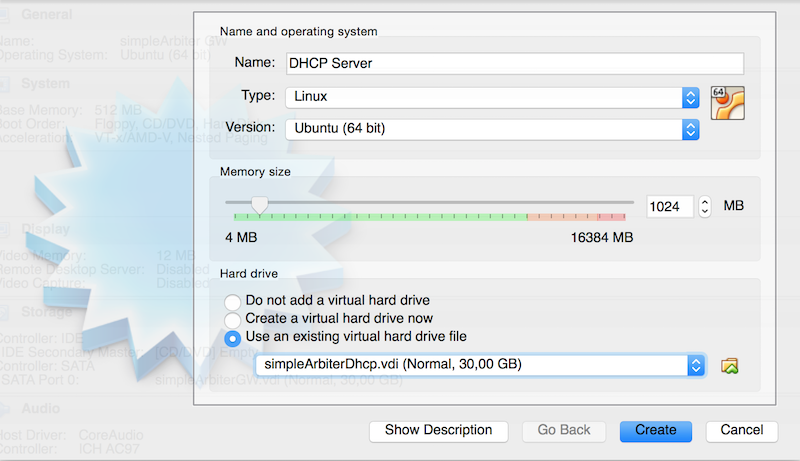
We download simpleArbiterDhcp.vdi ter zaženemo VirtualBox. Ko je datoteka prenesena v VirtualBoxu izberemo New ter v polje Name vpišemo DHCP Server.Ustrezno nastavimo tudi Memory size (1gb pomnilnika nam bo zadostovalo). Spodaj izberemo še "Use an existing virtual hard drive file" ter izberemo naš simpleArbiterDhcp in pritisnimo Create.
We run DHCP Server virtual machine and login using "root" ad username and "kaboom" as password.
At first, our machine has no assigned IP, since none was set! Let+s configure it in /etc/network/interfaces.But which interface should we configure? Using ifconfig -a command, we see it's eth0interface.
Again we select our IP address.
We save the configuration file. Our computer still has no IP address assigned to eth0, so using ifdown eth0 and then ifup eth0we provide one.

Now let us use ifconfig command, to check whether there is an IP assigned to interface eth0
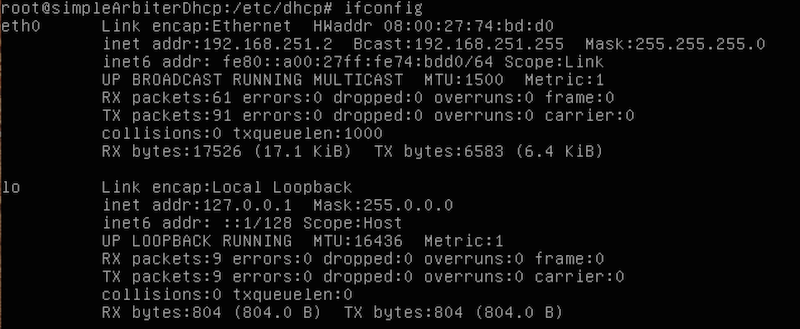
We got it! We install DHCP server using apt-get install isc-dhcp-server
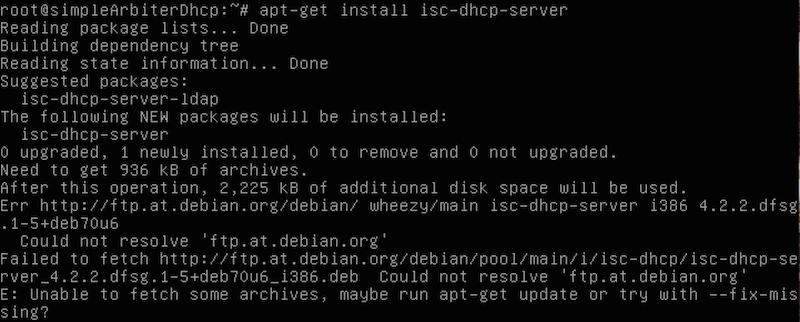
We see a bunch of errors. Why? Bacause, we have no internet access!
We need to specify the Gateway for our inteface. Our Gateway bo seveda IP našega simpleArbiter navideznega računalnika. To naredimo s pomočjo ukaza route add default gw 192.168.251.1 eth0

Try pinging Google's DNS server at 8.8.8.8, to check if now have internet access. We do this using the ping 8.8.8.8 command.
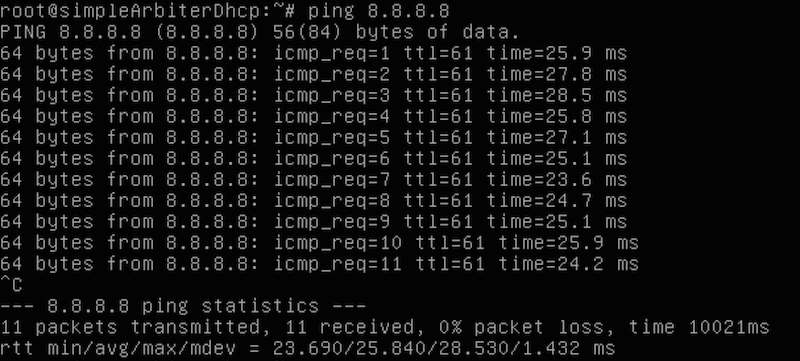
Google's DNS server is responding. Great! However, we still cannot run apt-get install isc-dhcp-server Let's tempororly add another interface and set it to NAT, so we get internet access and install the DHCP server. We add a new interface by turning off the virtual computer, in VirtualBox we select our virtual machine and then select Settings -> Network Adapter 1 has already been set to Internal Network, we set Adapter 2 to NAT

We run DHCP Server and in file/etc/network/interfaces at the end of the line add iface eth1 inet dhcp, then save the file and run ifup eth1.
Now we have access to the internet and can install our DHCP server with apt-get install isc-dhcp-server install command

Let's see what's in/var/log/syslog, which is a file where our system information is stored in.
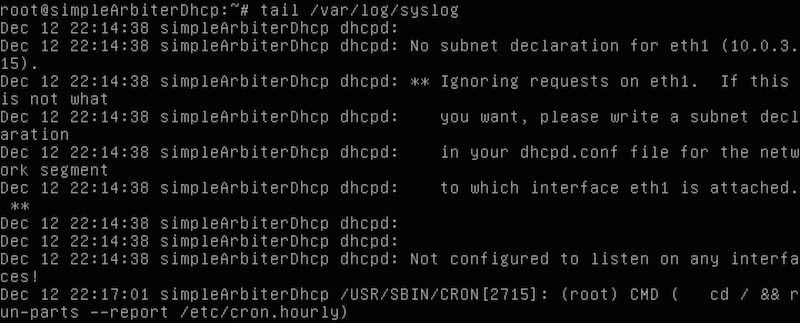
Looks like we need to set up a DHCP server and specify where it should listen! DHCP settings are stored in /etc/dhcp/dhcpd.conf. Let's set it! First let's comment out option domain-name-servers to avoid having errors.

Then we configure DHCP server, so it would serve IPs a a certain subnet. We add the following lines:
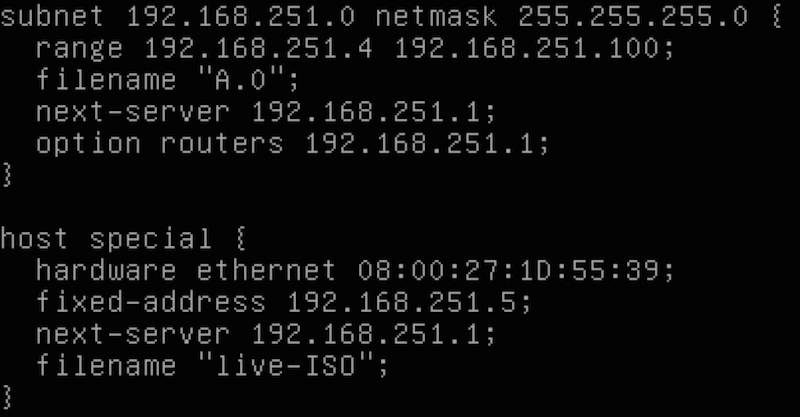
(subnet) We set the subnet and the IP range, which the DHCP server should use, and which file it should serve.
Some PXEs are so unintelligent, that you should specify where they should get the files from and to do that you specify next-server (IP from which it will be served from, in our case simpleArbiter), we also specify gateway, which, in our case is also simpleArbiter.Ker bi radi, da v primeru zagona navideznega računalnika BootableClient B serviramo drugo datoteko, to naredimo tako da definiramo nek dodaten host na sledeč način:(host special) Pod hardware ethernet zapišemo MAC naslov našega BootableClient B katerega bo imel, dodelimo mu nek statičen ip naslov ter povemo še iz kje se naj datoteka live-ISO zažene.We save the settings and kill terthe process with ubijemo named dnsmasqusingkilall dnsmasq.

Sledi restart našega DHCP strežnika, da bo deloval z novimi nastavitvami, to naredimo z ukazom service isc-dhcp-server restartDHCP server is now ready! We supply BootableClientA and BootableClientB and test them!
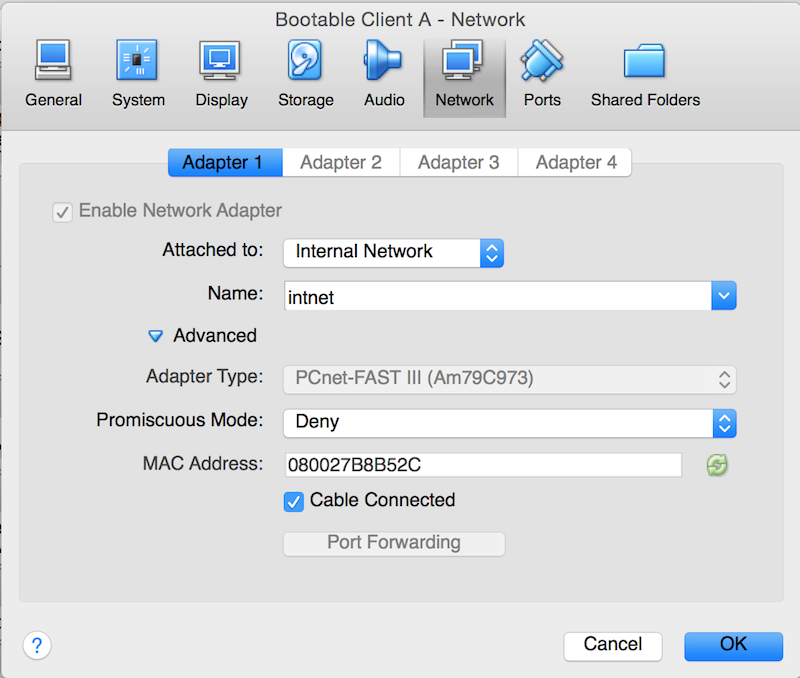
We open VirtualBox and select New, for the y Name field we specify BootableClient A and for the Hard drive we select Do not add a virtual hard drive (as we want diskless device), and select Create. We want the computer to be on Internal network so vse select our Bootable Client A and select Settings->Network where we change Adapter 1 to Internal Network.
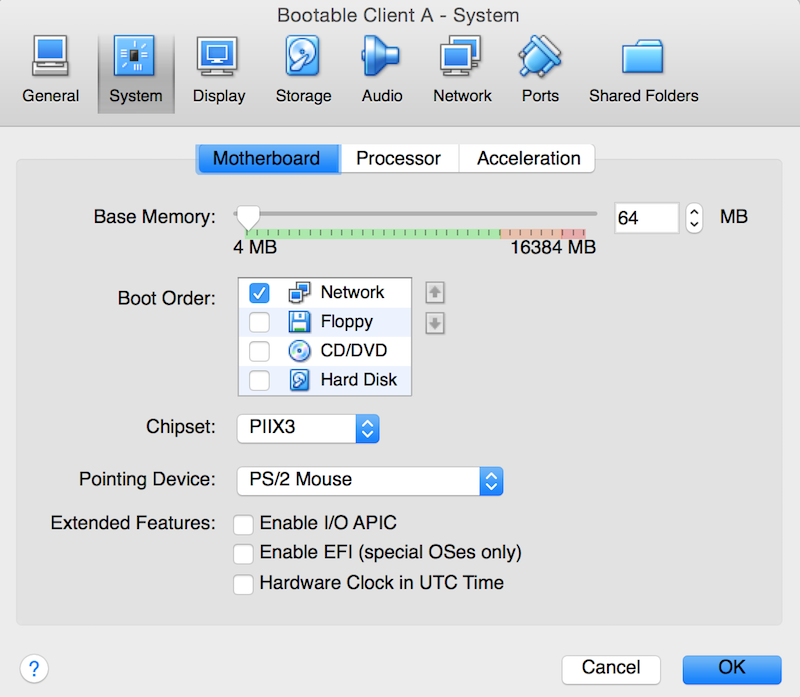
We also wan our computer to boot through network, so underBoot Ordertab select Network. We save the setting by clicking OK
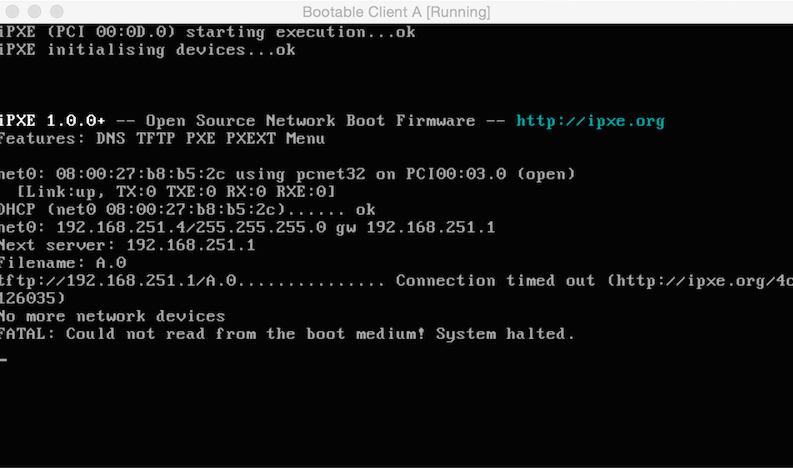
We run our BootableClient-a A and it get's it's IP(which is great), using the DHCP server and the simpleArbiter serves it exactly the file we specified. A.0
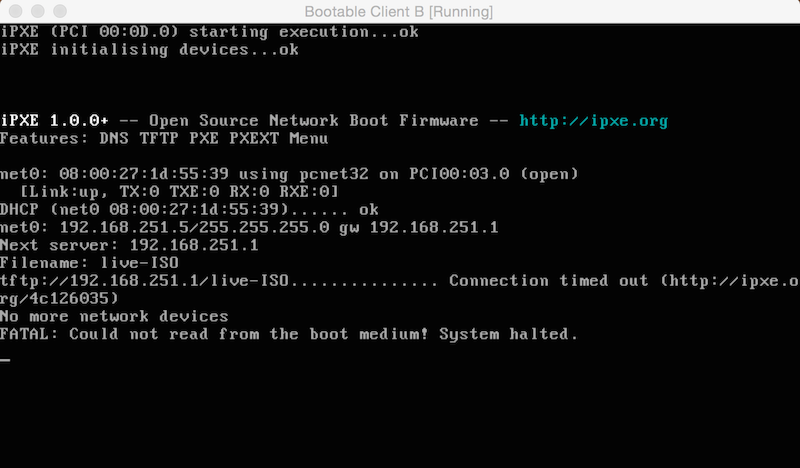
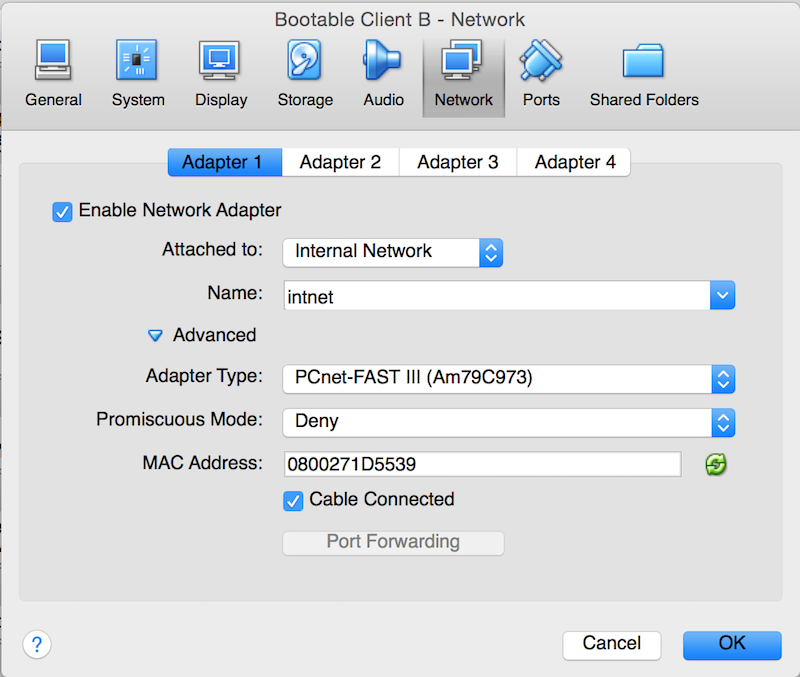
Odpremo VirtualBox ter izberemo New in pod Name napišemo BootableClient B ter pod Hard drive izberemo Do not add a virtual hard drive (saj si želimo računalnik brez diska), in pritisnemo na gump Create, da se nam ustvari navidezni računalnik. Želimo, da bo računalnik priklopljen na Internal network zato označimo naš Bootable Client B ter pritisnimo na Settings->Network in prvi Adapter 1 spremenimo na Internal Network. Poleg tega nastavimo še pod MAC Address takšen MAC naslov, kot ga imamo v nastavitvah DHCP strežnika (dhcpd.conf -> host special), saj želimo da bo ta naš računalnik izjema in bo ob zagonu dobil drugo datoteko kot ostali in sicer live-ISO
Želimo še, da se računalnik boot-a preko mreže, zato to nastavimo pod zavihkom System
tako, da pod Boot Order obkljukamo samo Network. Nastavitve shranimo z pritiskom na gumb OK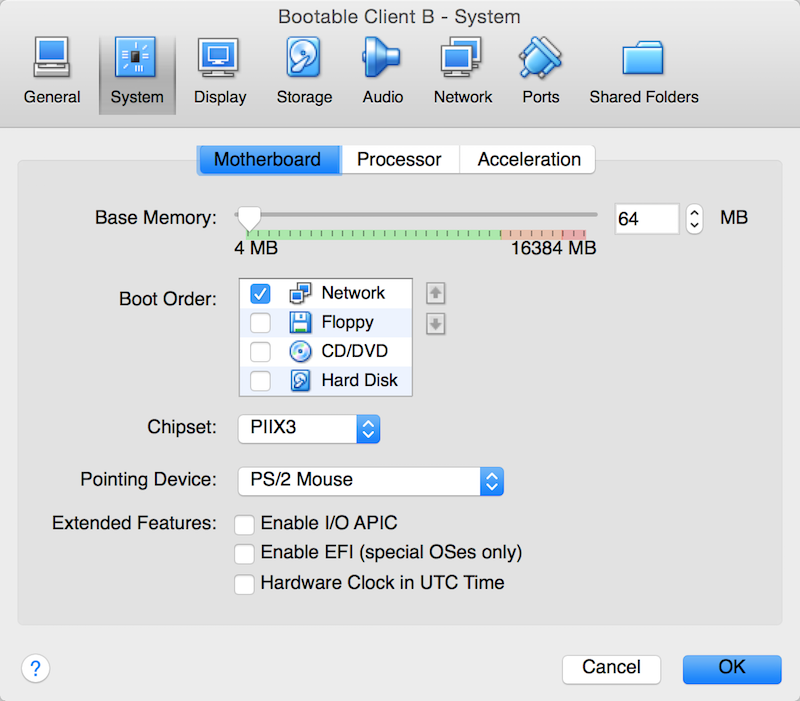
Poženemo našega BootableClient-a A in odličnoo, dobi ip naslov s pomočjo DHCP strežnika in simpleArbiter mu servira točno to datoteko katero si želimo live-ISO